WMC help
Themes, colors, text size and panel layout in Wandur
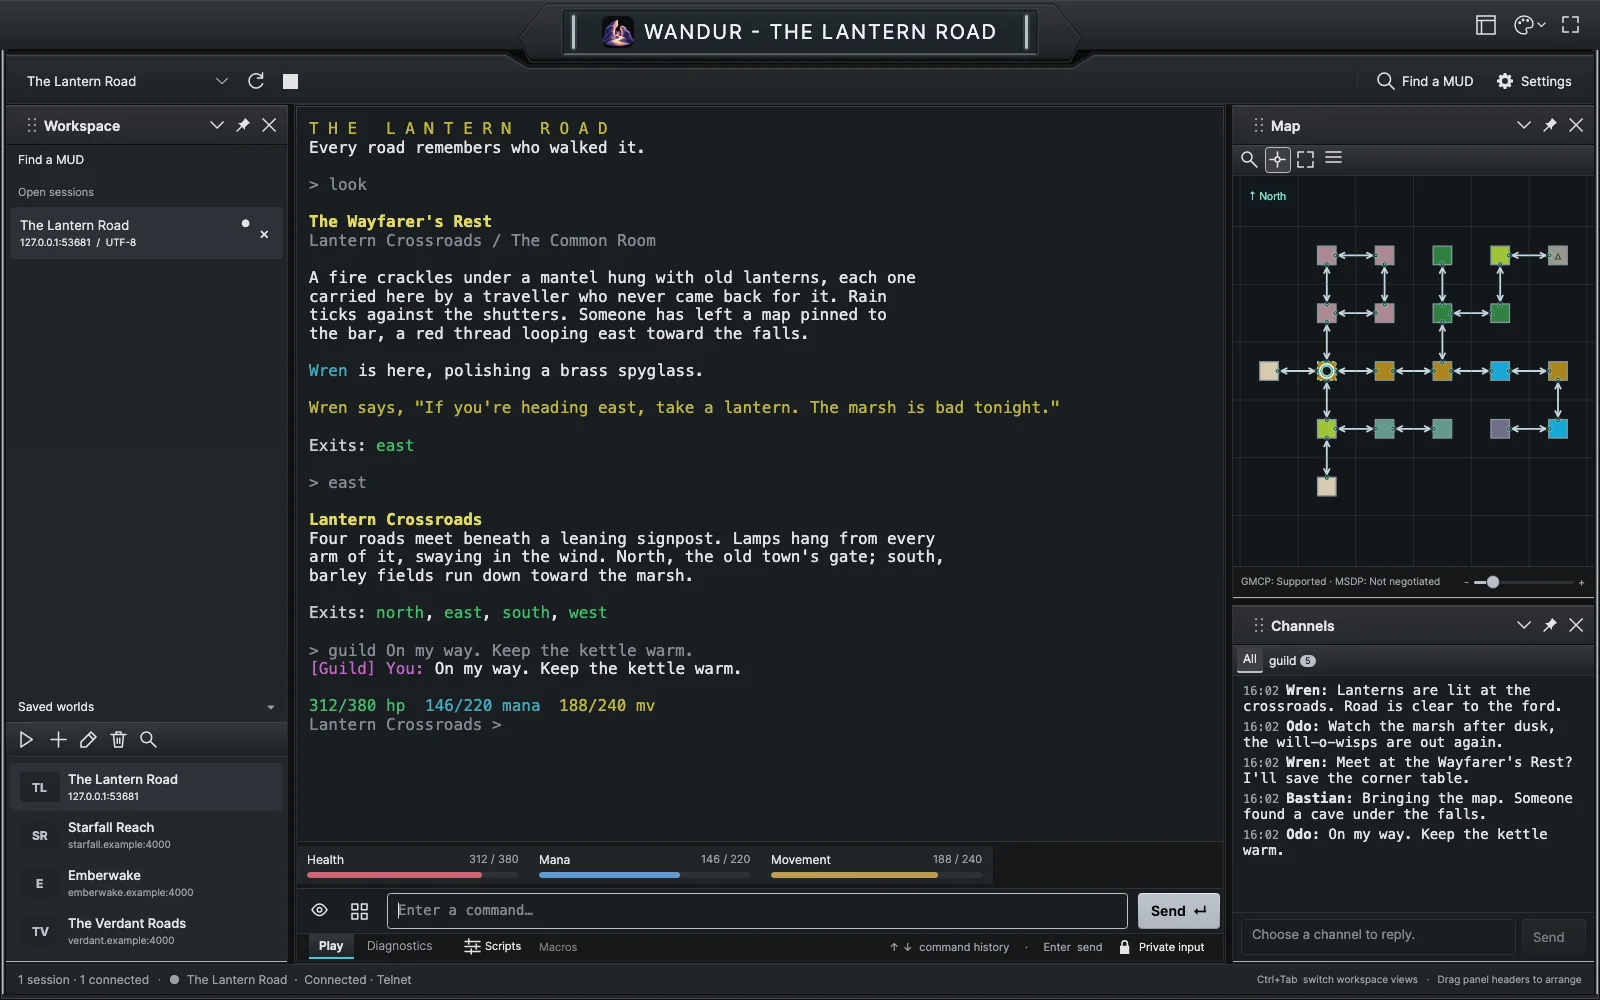
This page covers how Wandur looks and how its window is arranged: the built-in color themes, themes that worlds bring with them, making your own palette, text size, window skins, and moving, pinning, closing and restoring the panels around your session.
Built-in themes
Wandur ships eleven color themes. Each one sets the colors of the window, the panels and the map, plus a full set of sixteen terminal colors chosen to stay readable on that theme's transcript background.
| Theme | Look |
|---|---|
| Hull (the default) | Light window around a dark transcript |
| Ember, Moonlight, Forest, Midnight, Slate, Rose | Dark |
| Paper, Parchment, Daylight, Linen | Light |
The fastest way to switch is the palette button in the title bar (its tooltip reads Theme). It lists every theme with two color swatches, then your own themes, then Follow MUD theme. Choosing a theme here also turns off world themes, so your choice stays in place.
World themes
A world can bring its own colors. When a world in the wandur.net directory has a theme, Wandur applies it when you open that world's session. The theme follows the session you are looking at: switch to another session and its colors (or yours) take over, and close the session to return to your own theme. The theme is saved with the world, so it still applies when you are offline.
A world theme changes colors only; it cannot change your skin. If you changed the MUD text colors in a custom theme (see below), those changes stay active under a world theme.
To turn world themes off, use either of these:
- uncheck Follow MUD theme in the title bar's palette menu;
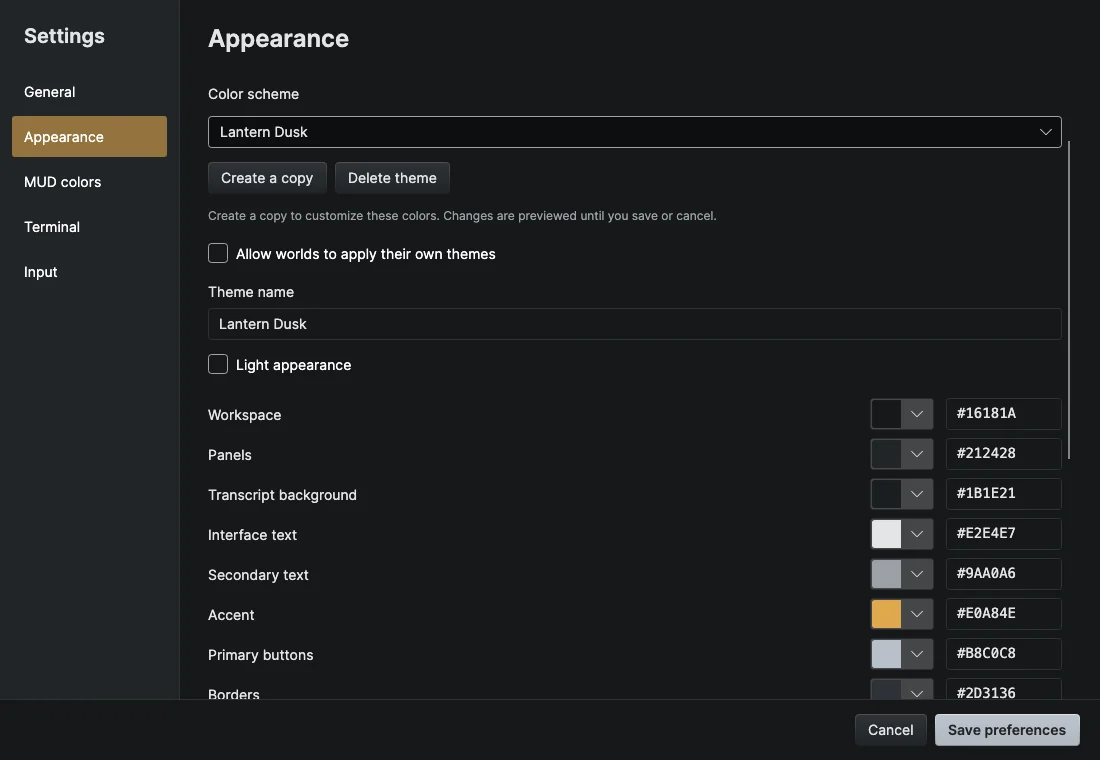
- uncheck Allow worlds to apply their own themes in Settings → Appearance.
With world themes off, your own theme is used everywhere.
Making your own theme
Built-in themes cannot be edited, but you can copy one and change the copy.
- Open Settings: Preferences… in the Wandur menu on macOS, or Edit → Preferences… on Windows and Linux. The shortcut is ⌘, on macOS and Ctrl+, elsewhere.
- Go to Appearance, pick a theme under Color scheme, and choose Create a copy.
- Give it a Theme name, and check Light appearance if it is a light theme.
- Change any color with its color picker or by typing a hex value such as
#1F2933. You can set Workspace, Panels, Transcript background, Interface text, Secondary text, Accent, Borders, Transcript text, Map background, Map grid, the script editor colors and more. - Choose Save preferences, or Cancel to undo everything.
Changes preview live while the dialog is open. You can keep up to 100 custom themes; Delete theme removes the selected one.
MUD text colors
Worlds color their text with sixteen standard terminal (ANSI) colors. To change those for a custom theme, open Settings → MUD colors, pick your theme, and adjust each color. Reset returns one color to its default. A world that sends exact RGB colors keeps them; only the sixteen standard colors follow your theme.
Text size and transcript colors
In Settings → Terminal:
- Session text size sets the transcript text size, from 11 to 28 (the default is 15). A preview line shows the result.
- Text color · optional #RRGGBB and Background · optional #RRGGBB override the transcript colors. Leave them blank to use the theme's colors.
- Allow blinking MUD text lets text that the world marks as blinking actually blink. It is off by default.
Skins
A skin sets the shape of the window frame and panel headers, separately from colors. Choose one from View → Skin or Settings → Appearance → Skin:
- Fleet, the default;
- Armored, with heavier plated edges;
- System, a plain toolbar in the operating system's own title bar.
The panels
The window is built from docked panels around your session:
- Workspace on the left lists Find a MUD, your Open sessions and your Saved worlds.
- The session sits in the center. It always stays there and cannot be closed from its panel.
- Map and Channels share the right side, one above the other. See The map and Channels.
Moving and resizing
Drag the divider between two panels to resize them. To move a panel, drag it by its header and drop it on one of the docking targets that appear, to put it at another edge or alongside another panel.
Panel header buttons
Each panel header has three buttons:
- the chevron opens a menu with Float (move the panel into its own window), Dock (put a floating panel back), Auto Hide and Close;
- the pin hides the panel into a tab at the edge of the window, to save space; click that tab to open it, and use the pin again to dock it back;
- the × closes the panel.
When both the Map and Channels panels are closed or hidden, the right column disappears and the session takes the space.
Bringing panels back
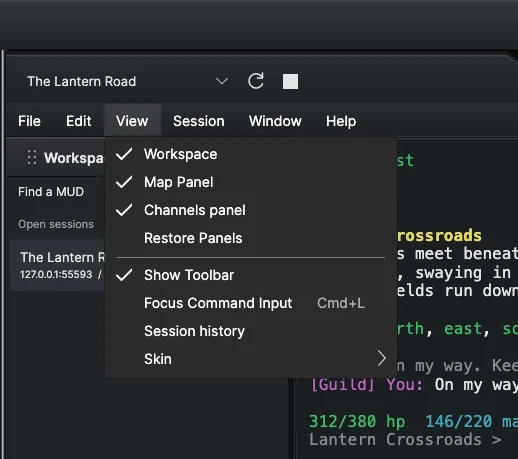
The View menu has a check mark next to each panel: Workspace, Map Panel and Channels panel. Choose one to show or hide it. Restore Panels puts every panel back in its default place; it also closes any open map editors. Show Toolbar hides or shows the toolbar at the top of the window.
Wandur starts with the default layout each time it opens.
Workspace views
Sessions, the Find a MUD page and map editors all share the center of the window. Switch between them in the Workspace panel, or with the keyboard. Right-click an open session to open, rename or close it; right-click a map editor and choose Open in separate window to give it a window of its own.
Keyboard shortcuts
The status bar at the bottom of the window reminds you of two of these: "Ctrl+Tab switch workspace views" and "Drag panel headers to arrange". Below the transcript, the session footer shows "↑ ↓ command history · Enter send", and Tab to accept a suggested completion when one appears.
| Action | macOS | Windows and Linux |
|---|---|---|
| Next workspace view | Control+Tab | Ctrl+Tab |
| Previous workspace view | Control+Shift+Tab | Ctrl+Shift+Tab |
| Close the selected view | ⌘W | Ctrl+W |
| Focus the command box | ⌘L | Ctrl+L |
| Find a MUD | ⌘T | Ctrl+T |
| Add a world | ⌘N | Ctrl+N |
| Connect to the selected world | ⌘Return | Ctrl+Enter |
| Disconnect | ⌘D | Ctrl+D |
| Save the transcript | ⌘S | Ctrl+S |
| Settings | ⌘, | Ctrl+, |
| Full screen | Control+⌘F | F11 |